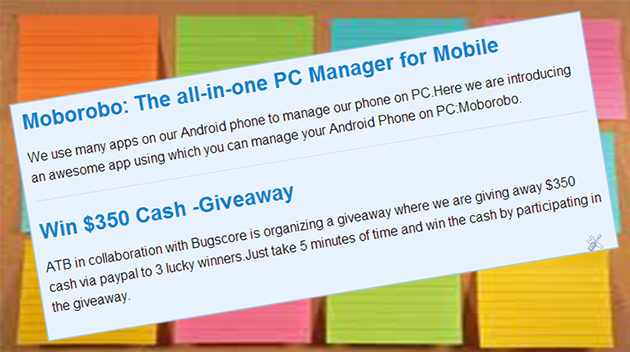
If you notice my blog homepage I have recently added a sticky posts widget above all the posts.Which will show selected posts with custom Title and Description only on the homepage and it will be hided on Posts,Labels and Archive Pages.This can be implemented with a simply conditional tag in Blogger Blogs.
Steps to Add Sticky Posts Widget in Blogger:
//Copy the below code and paste it in your widget
<style type="text/css">
.sticky {
font-family: "Helvetica Neue", Arial, sans-serif;
background:#e8f2fc;
width:665px;
height:100%;
padding-top:10px;
padding-bottom:10px;
padding-right:10px;
padding-left:10px;
border: 2px solid #A5CEF6;
}
.sticky a {
  color: #004489;
  font-size:25px;
  text-decoration: none;
  font-weight:bold;
}
.sticky a:hover {
color: #004489;
text-decoration: none;
}
</style>
<div class="sticky">
<a href="http://www.alltechbuzz.net/....html"> Moborobo:
The all-in-one PC Manager for Mobile</a>
<br />
We use many apps on our Android phone
to manage our phone on PC....<br />
<div style="border-top: 1px #ddd solid;">
<a href="http://www.alltechbuzz.net...html">Win $350
Cash -Giveaway</a>
<br />
ATB in collaboration with Bugscore is organizing ...</div>
</div>
- Above I created a simple code using HTML and CSS. If you are good at CSS then you can go ahead and do some editing to the above code to fit it to design of your blog.
- Now this will appear on all the pages and posts of your blog.You have to restrict this only to homepage just follow the below steps.
- Go to Layout and then click on EDIT Button on your widget to grab the ID of your widget.
You will notice something at the end of the url widgetId=HTML3. Here my widget ID is HTML3, similarly your widget will have some ID, copy it and follow the below steps.
- Now Go to Template Option from the Blogger Dashboard and search for your widget id and locate it.
//Make Changes in the code with If Tags
<b:widget id="HTML3" locked="false" title="" type="HTML">
<b:includable id="main">
<b:if cond="data:blog.url == data:blog.homepageUrl">
<!-- only display title if it's non-empty -->
<b:if cond="data:title != """>
<h2 class="title">
<data:title></data:title></h2>
</b:if>
<div class="widget-content">
<data:content>
</data:content></div>
<b:include name="quickedit"></b:include></b:if>
</b:includable>
</b:widget>
- You wont notice the IF tags on the 4th line and 9th line in the above code.Just add these two in the exact same place as shown in the below example and then save the template.
Now you should see the sticky post widget only on the homepage and it will automatically hided on the other pages.
Customization:
- If you are good at CSS and HTML then you can do a lot of customization to the sticky posts.Here I am quoting some simple and quick edits.
- Here my blog width is 665px, if your blog width is a little lesser than this or more than this change it to fit exactly to your blog width.
- To change the background color just change background: #e8f2fc
- Similarly you can also change the border colour from #A5CEF6 to colour of your choice.
- To change the link colour you can simply change #004489 from to the colour of your choice.
- Then to place posts of your choice in the HTML widget just replace the title and description in sticky posts widget code which is very simple and straight forward.
Do let me know if you are facing any trouble in adding this Sticky Post widget in your comments. I can help you.
- Also Check: Best Blogger Templates


No comments:
Post a Comment